
ASP .NET (C#) SNMP Trap Sender Sample Source Code
Network Component provides an easy-to-use development interface to a variety of IP protocols. By using Network Component, you can very easily create or enhance applications with network features.
Network Component features the following: DNS, FTP, HTTP, HTTPs, ICMP Ping, IP-to-Country, MSN, NTP, RSH, SCP, SFTP, SNMP v1/v2c (Get, GetNext, Set), SNMP Traps, SNMP MIB, SSH, TCP, Telnet, TFTP, UDP, Telnet, Wake-On-LAN and more.
Network Component can be well integrated into any development platform that supports ActiveX objects.
SNMP MIB Browsing can be well integrated into ASP .NET environments. This document describes how Network Component's SNMP MIB Browser can be integrated into ASP .NET projects.
A management information base (MIB) is a database used to manage the devices in a communications network. The database is hierarchical (tree-structured) and entries are addressed through object identifiers (OID's). A MIB should contain information on these commands and on the target objects (controllable entities or potential sources of status information) with a view to tuning the network transport to the current needs. Each type of object in a MIB database has a name, a syntax, and an encoding. The name is represented uniquely as an OID. An OID is an administratively assigned name. The administrative policies used for assigning names are discussed later in this memo.
Use Network Component's 'SnmpMibBrowser' object to load a MIB database into memory and iterate over all objects and view all properties.
Step 1: Download and install Network Component
Download Network Component from the ActiveXperts Download Site and start the installation. The installation guides you through the installation process.
Step 2: Create a new ASP .NET C# Project
Launch Microsoft Visual Studio from the Start menu. Choose 'New' from the 'File' menu and click on 'Web Site'. In the 'Web Site' dialog, select 'ASP .NET Web Application'. Select a name for the application and a name for the solution. Also, select the directory where you want to store the project:
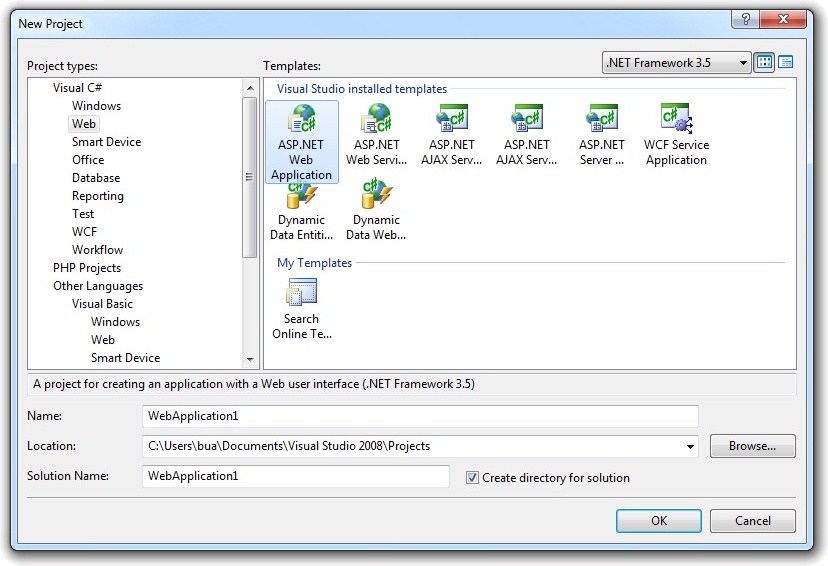
(Click on the picture to enlarge)
Step 3: Refer to the Network Component Library and create the objects
Now that a new project has been created, you must add a reference to the Network Component library in the project to be able to use the Network Component object. To do so, choose 'Add Reference...' from the 'Project' menu. In the 'Add Reference' dialog that pops up, select the 'COM' tab and select the 'Network Component Type Library' as shown in the following picture:
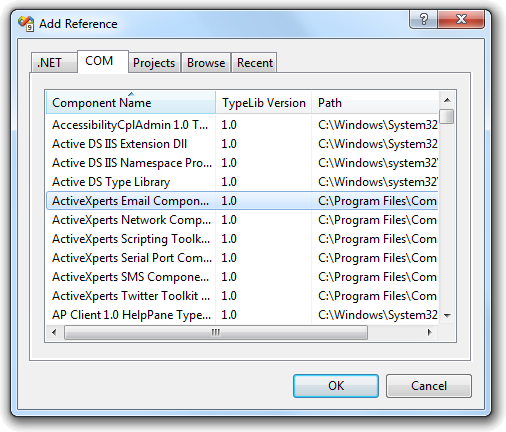
(Click on the picture to enlarge)
Click 'OK' to close the 'Add Reference' dialog.
On top of your code, type the following line to use the Network Component namespace:
using AxNetwork;
Step 4: Create the objects
In your Main function, declare and create the following object:
public SnmpTrapManager m_objSnmpTrapManager;
m_m_objSnmpTrapManager = new SnmpTrapManager();
You can download the complete samples here. There are many other working Network Component scripts on our site and shipped with the product.
NOTE: Demo Projects are created with Microsoft Visual Studio 2008
The Network Component project ships with a set of Microsoft Visual Studio .NET samples, including samples for Microsoft Visual C# .NET. The projects are created with Microsoft Visual Studio 2008.
Users with a later version of Microsoft Visual Studio can open such a project. The Visual Studio Conversion Wizard will guide you through the process of converting the project to the version used.